PyMedPhys Installation
Install Python
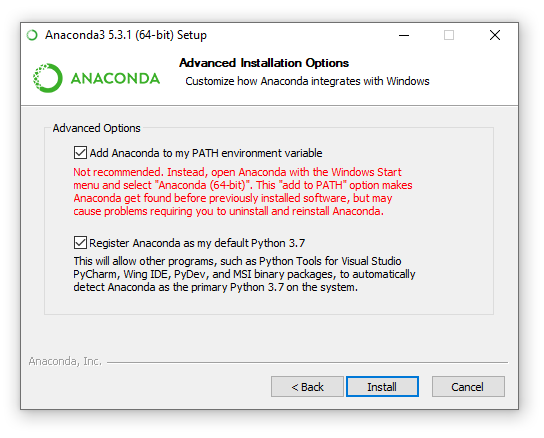
In order to make use of the PyMedPhys library, you’ll need Python installed on your workstation. On Windows we recommend that you install the Anaconda Python distribution. Download the latest Anaconda Python 3 (not 2) version from here.
Note
When installing Anaconda make sure to install it for your user only, and tick the option “add to path”.
On Linux or MacOS we recommend not using your system Python and instead managing your Python installation using something like pyenv.
OS specific extra steps
PyMedPhys uses a range of dependencies, most of which can be automatically installed. However there are two libraries which need a few extra steps depending on the OS you are using.
Extra steps for MacOS
Due to the pymssql dependency which is used to connect to Microsoft SQL
databases (such as Mosaiq) we need to follow some of their pre-install steps
(<http://www.pymssql.org/en/stable/intro.html#install>).
This in particular impacts MacOS where you will need to install both
freetds and cython before installing
pymedphys. The easiest way to install freetds is via homebrew.
So, do the following to install homebrew (as described at <https://brew.sh/>):
/usr/bin/ruby -e "$(curl -fsSL https://raw.githubusercontent.com/Homebrew/install/master/install)"
Open a new shell, then run:
brew install freetds
To install cython run:
pip install cython
Extra steps for Linux and Windows
At this point in time there are none.
Installing PyMedPhys
Once ready, you can now install PyMedPhys via pip downloaded from PyPI:
pip install pymedphys
Installing Bleeding Edge
If you wish to be able to contribute to PyMedPhys itself you are going to want to instead install PyMedPhys from the master branch on GitHub <https://github.com/pymedphys/pymedphys>. To achieve this follow the OS specific instructions within the contributor tutorials: